在学习Kotlin Flow之前,我们先举一个例子,循环调用10次网络请求,获取的结果平方,然后过滤掉奇数,最后取前2个,然后打印。
请先在 build.gradle.kts 中添加协程依赖项
1 implementation("org.jetbrains.kotlinx:kotlinx-coroutines-core:1.6.4" )
1
2
3
4
5
6
7
8
9
10
11
12
13
14
15
16
17
18
19
20
21
22
23
24
25
26
27
28
29
30
31
32
33
34
35
36
37
38
39
40
41
42
43
44
45
46
47
48
49
50
import kotlinx.coroutines.delayimport kotlinx.coroutines.flow.*import kotlinx.coroutines.runBlockingimport kotlin.random.Randomfun main () Unit = runBlocking { useFlow() } suspend fun useFlow () val flow = flow { repeat(10 ) { emit(request()) } } flow.map { it * it } .filter { it % 2 == 0 } .take(2 ) .onEach { println(it) } .collect() } suspend fun notUseFlow () var count = 0 repeat(10 ) { var res = request().let { it * it } if (count == 2 ) { return } if (res % 2 != 0 ) return @repeat ++count println(res) } } suspend fun notUseFlow2 () val resList = (0 until 10 ).map { request() } resList.map { it * it } .filter { it % 2 == 0 } .take(2 ) .onEach { println(it) } } suspend fun request () Int { delay(Random.nextLong(1000 )) return Random.nextInt(100 ) }
其中 notUseFlow 和 notUseFlow2 两个函数是不使用 Flow 的方式,useFlow 是使用 Flow 的方式。notUseFlow 是一种常规写法,但是代码较冗余,不易阅读,简单场景可以使用。notUseFlow2 是采用链式操作,代码简单,易读,但是因为 request 是一个阻塞的方法,会阻塞在 .map 操作,导致代码时间消耗高。而 useFlow 是采用 Flow 的方式,代码简单,可读性强,不会阻塞。
首先我们看一下创建流的几种方式:
1
2
3
4
5
fun main () Unit = runBlocking { (1. .10 ).asFlow() listOf(1 , 2 , 3 ).asFlow() flowOf(1 , 2 , 3 ) }
asFlow , flowOf都是通过flow高阶函数进行创建的
1
2
3
4
5
6
7
8
9
10
11
12
13
14
15
16
17
18
import kotlinx.coroutines.flow.*import kotlinx.coroutines.runBlockingfun main () Unit = runBlocking { val flow = flow { repeat(10 ) { emit(it) } } flow.map { it * it } .filter { it % 2 == 0 } .take(2 ) .onEach { println(it) } .collect() }
其中 emit() 和 .collect() 为suspend挂起函数,需要在协程中执行, emit() 为生产者,collect() 为消费者。.map() 和 .filter() 是实现的transform 高阶函数,实际上,我们的流操作可以通过transform来实现。
下面代码和上面代码实现的功能完全一样:
1
2
3
4
5
6
7
8
9
10
11
12
13
14
15
16
17
18
19
20
21
import kotlinx.coroutines.flow.*import kotlinx.coroutines.runBlockingfun main () Unit = runBlocking { val flow = flow { repeat(10 ) { emit(it) } } flow.transform { num -> val newNum = num * num if (newNum % 2 == 0 ) { emit(newNum) } }.take(2 ) .onEach { println(it) } .collect() }
它是通过 MutableSharedFlow 创建
1
2
3
4
5
6
7
8
9
10
11
12
13
14
15
import kotlinx.coroutines.flow.MutableSharedFlowimport kotlinx.coroutines.flow.collectimport kotlinx.coroutines.flow.onEachimport kotlinx.coroutines.runBlockingfun main () Unit = runBlocking { val sharedFlow = MutableSharedFlow<Int >() repeat(10 ) { sharedFlow.emit(it) } sharedFlow.onEach { println(it) }.collect() println("end" ) }
运行程序,我们发现它没有任何输出,没有输出就对了,因为它是自己生产自己的,不管消费者是否订阅。而且不会打印 end 信息,因为消费者不知道流是什么时候结束的,所以它会一直订阅,因为它是挂起的,所以会阻塞这一行。这是我们会使用 .launchIn(this) 把它开到新的协程作用域里面,此时它就不会阻塞我们了。
1
2
3
4
5
6
7
8
9
10
11
12
13
14
15
import kotlinx.coroutines.flow.MutableSharedFlowimport kotlinx.coroutines.flow.launchInimport kotlinx.coroutines.flow.onEachimport kotlinx.coroutines.runBlockingfun main () Unit = runBlocking { val sharedFlow = MutableSharedFlow<Int >() repeat(10 ) { sharedFlow.emit(it) } sharedFlow.onEach { println(it) }.launchIn(this ) println("end" ) }
MutableSharedFlow函数的参数
replay 1 2 3 4 5 6 7 8 9 10 11 12 fun main () Unit = runBlocking { val sharedFlow = MutableSharedFlow<Int >( replay = 3 , ) repeat(10 ) { sharedFlow.emit(it) } sharedFlow.onEach { println(it) }.launchIn(this ) println("end" ) }
extraBufferCapacity 1 2 3 4 5 6 7 8 9 10 11 12 13 14 15 fun main () Unit = runBlocking { val sharedFlow = MutableSharedFlow<Int >( extraBufferCapacity = 1 , ) sharedFlow.onEach { println("收到数据$it " ) delay(1000 ) }.launchIn(this ) delay(1000 ) repeat(10 ) { println("发送次数${it + 1 } " ) sharedFlow.emit(it) } println("end" ) }
注意replay和extraBufferCapacity一起使用,缓冲区容量等于它们之和
1 2 3 4 5 6 7 8 9 10 11 12 13 14 15 16 fun main () Unit = runBlocking { val sharedFlow = MutableSharedFlow<Int >( replay = 3 , extraBufferCapacity = 1 , ) sharedFlow.onEach { println("收到数据$it " ) delay(1000 ) }.launchIn(this ) delay(1000 ) repeat(10 ) { println("发送次数${it + 1 } " ) sharedFlow.emit(it) } println("end" ) }
从MutableSharedFlow源码中也可以看出:
onBufferOverflow 1 2 3 4 5 6 7 8 9 10 11 12 13 14 15 16 17 18 19 20 fun main () Unit = runBlocking { val sharedFlow = MutableSharedFlow<Int >( replay = 3 , extraBufferCapacity = 1 , onBufferOverflow = BufferOverflow.DROP_LATEST ) sharedFlow.onEach { delay(1000 ) println(it) }.launchIn(this ) delay(1000 ) repeat(10 ) { sharedFlow.emit(it) } println("end" ) }
这是一个常用到的东西,跟Android中的 LiveData 是一样的效果,主要是对某一个状态进行响应式监听和改变。
1 2 3 4 5 6 7 8 9 10 11 12 13 14 import kotlinx.coroutines.flow.MutableStateFlowimport kotlinx.coroutines.launchimport kotlinx.coroutines.runBlockingfun main () Unit = runBlocking { val stateFlow = MutableStateFlow(1 ) stateFlow.emit(2 ) launch { stateFlow.collect { println(it) } } stateFlow.emit(3 ) }
接下来写一个Android的例子:
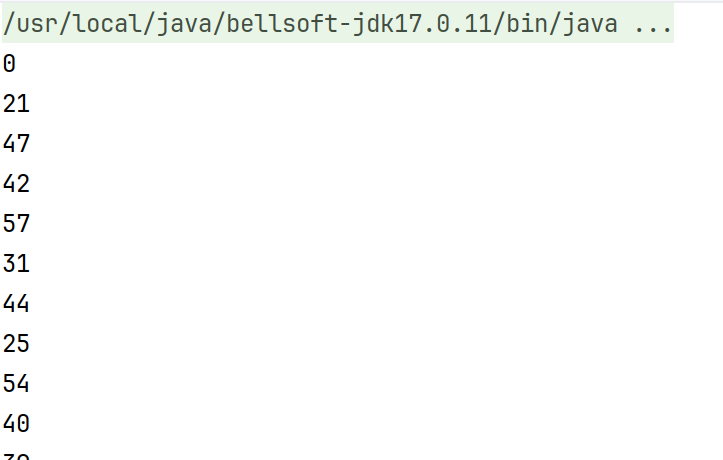
1 2 3 4 5 6 7 8 9 10 11 12 13 14 15 16 17 18 19 20 21 22 23 24 25 26 27 28 29 30 31 32 33 34 import kotlinx.coroutines.delayimport kotlinx.coroutines.flow.MutableStateFlowimport kotlinx.coroutines.flow.asStateFlowimport kotlinx.coroutines.isActiveimport kotlinx.coroutines.launchimport kotlinx.coroutines.runBlockingimport kotlin.random.Randomfun main () Unit = runBlocking { val viewModel = ViewModel() launch { viewModel.age.collect { println(it) } } launch { while (isActive) { viewModel.updateAge() } } } class ViewModel { private val _age = MutableStateFlow(0 ) val age = _age.asStateFlow() suspend fun updateAge () _age.emit(ageRequest()) } } suspend fun ageRequest () Int { delay(Random.nextLong(1000 )) return Random.nextInt(20 , 60 ) }
这里将 _age 设计为私有的,而只是把只能监听的状态 age 暴露出去,是因为在架构设计中,viewmodel 本身就是为了把数据和页面分离开,页面只管监听数据的改变进行更新就行了。