
redis学习之旅
Widows和Linux下如何安装Redis
要学习什么之前就需要先安装它,那么我们首先来安装一下redis。
安装包可以去redis官网或者github中查看:
Widows下安装Redis
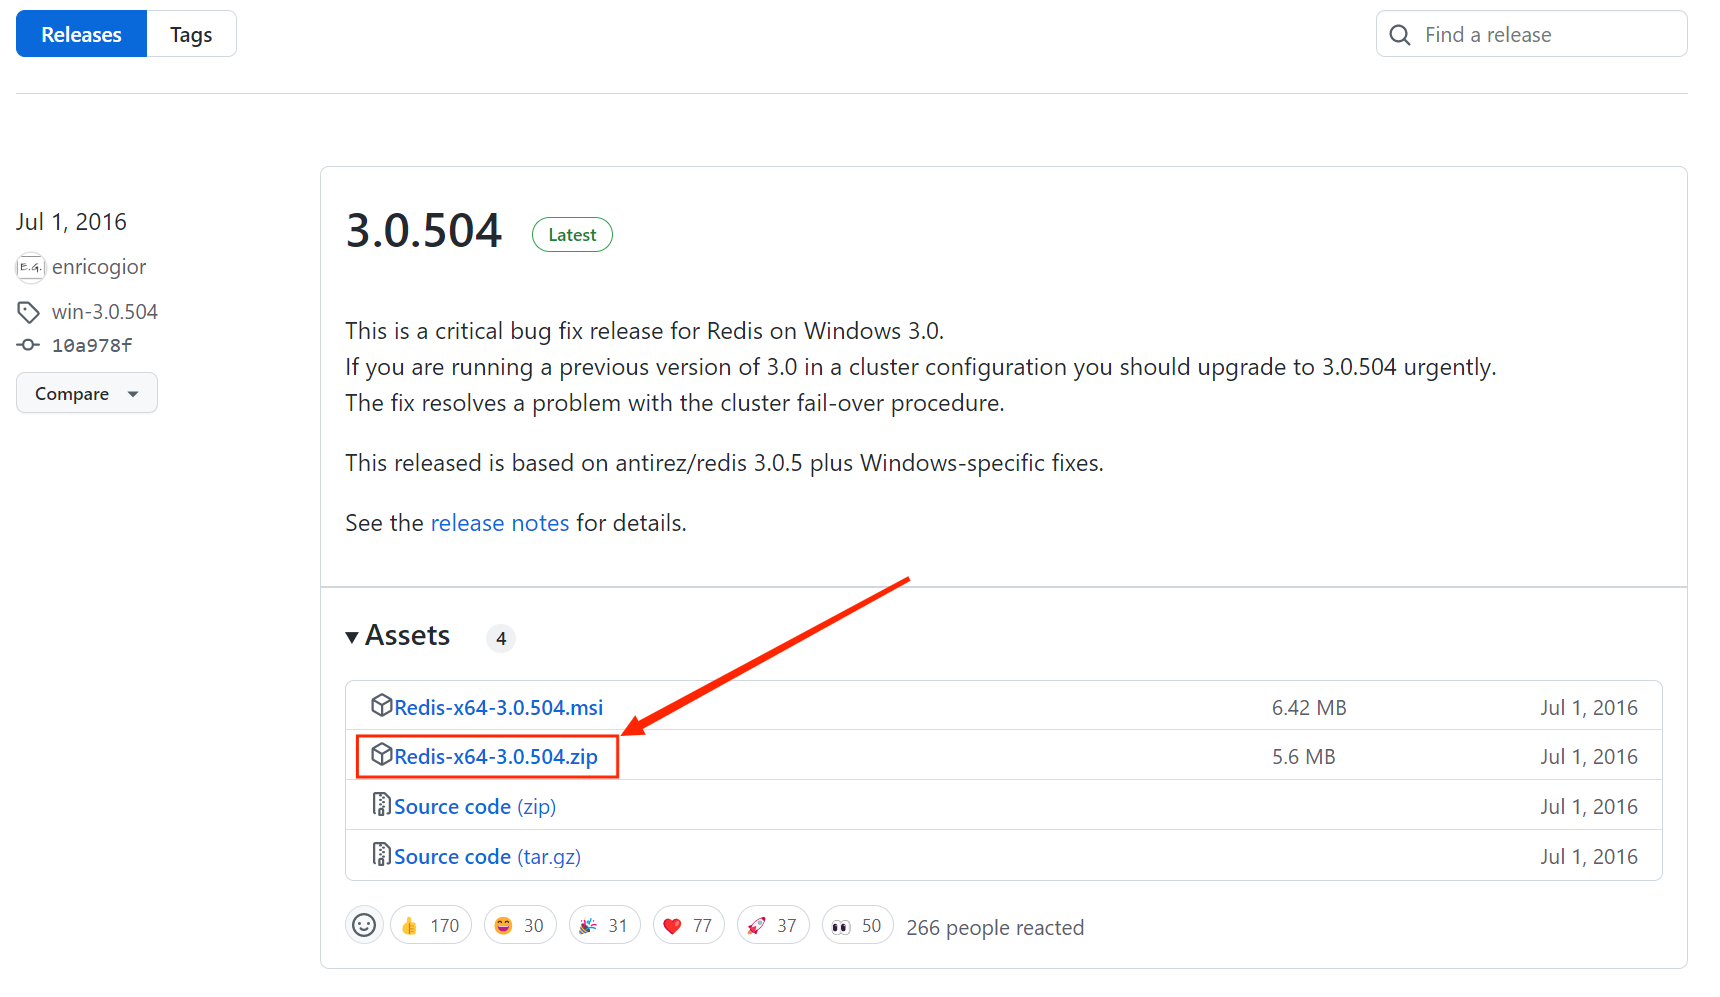
去Windows版github地址下载.zip压缩包

下载完成后解压到你要存放的目录
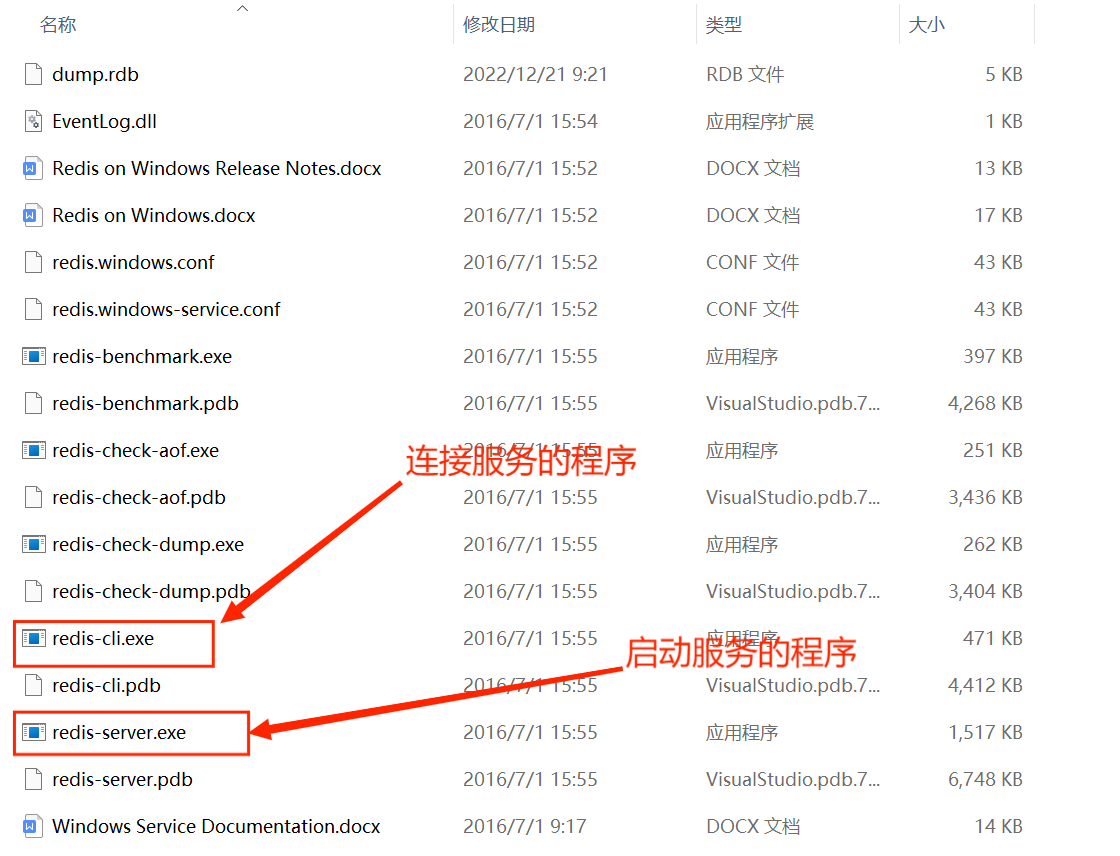
查看文件夹内内容
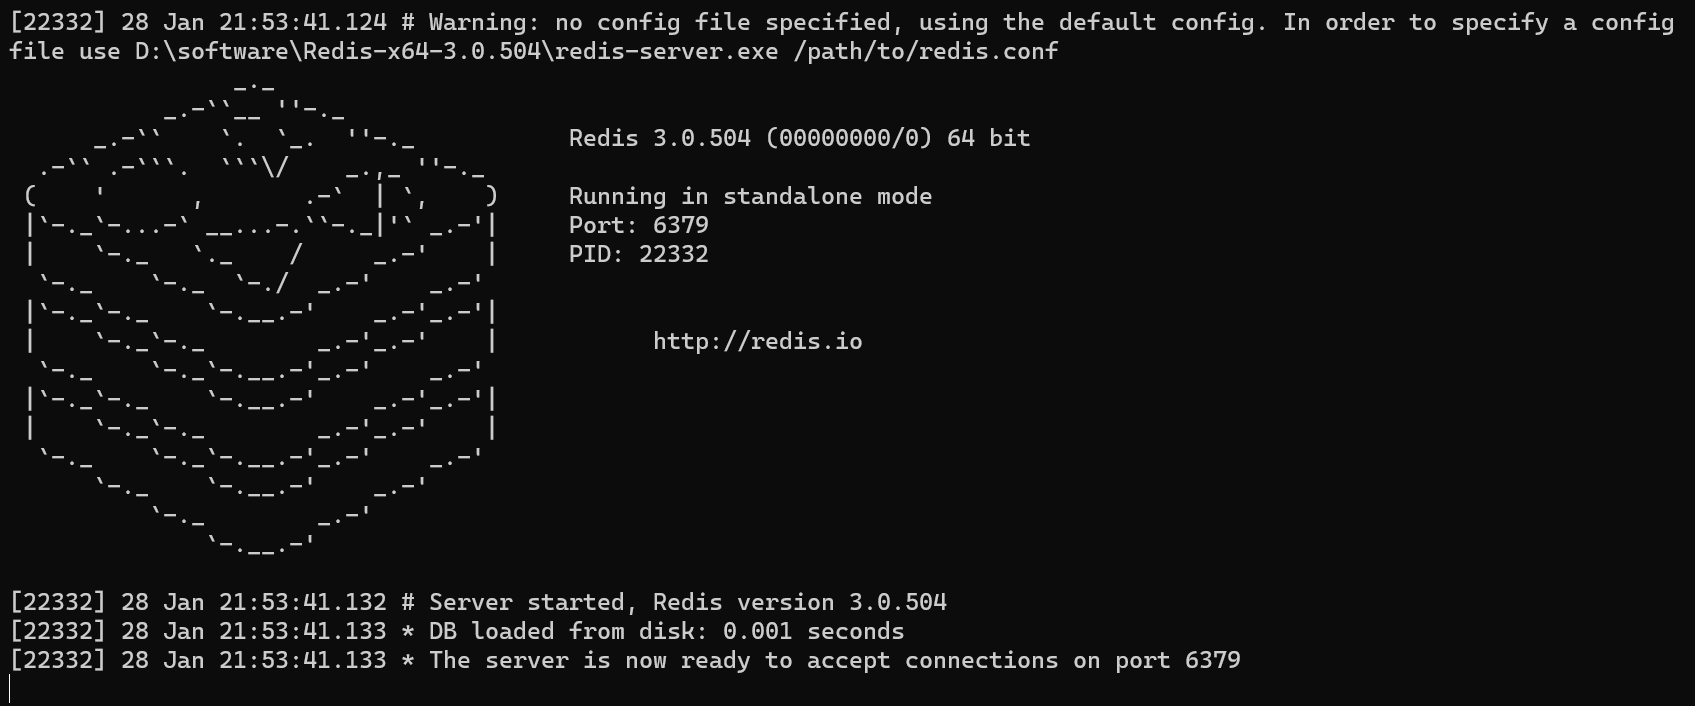
先点击redis-server.exe启动Redis服务
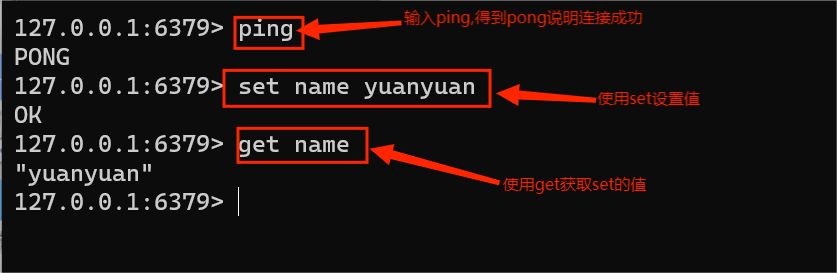
再点击redis-cli.exe连接Redis
测试Redis

Linux下安装Redis
去redis官网或者redis官方github地址下载.tar.gz压缩包
或者直接使用wget或者curl命令下载
1
2
3
4
5
6
7
8
9
10
11
12
13
14
15
16
17
18
19
20
21
22
23
24
25
26
27
28
29
30
31
32
33
34
35
36
37
38
39
wget https://github.com/redis/redis/archive/7.0.8.tar.gz
2. 使用`tar -zxvf 需要解压的包名`命令解压
<img src="https://cdn.jsdelivr.net/gh/liaojie1314/PicGo@master/images/202302021218925.png" alt="image-20230202121756828" style="zoom:67%;" />
3. 进入文件夹查看文件
<img src="https://cdn.jsdelivr.net/gh/liaojie1314/PicGo@master/images/202302021219870.png" alt="image-20230202121918831" style="zoom:80%;" />
4. 接下来我们安装基本环境gcc,安装命令:`yum install gcc-c++`,中途输入`y`即可
<img src="https://cdn.jsdelivr.net/gh/liaojie1314/PicGo@master/images/202302021222435.png" alt="image-20230202122206371" style="zoom:80%;" />
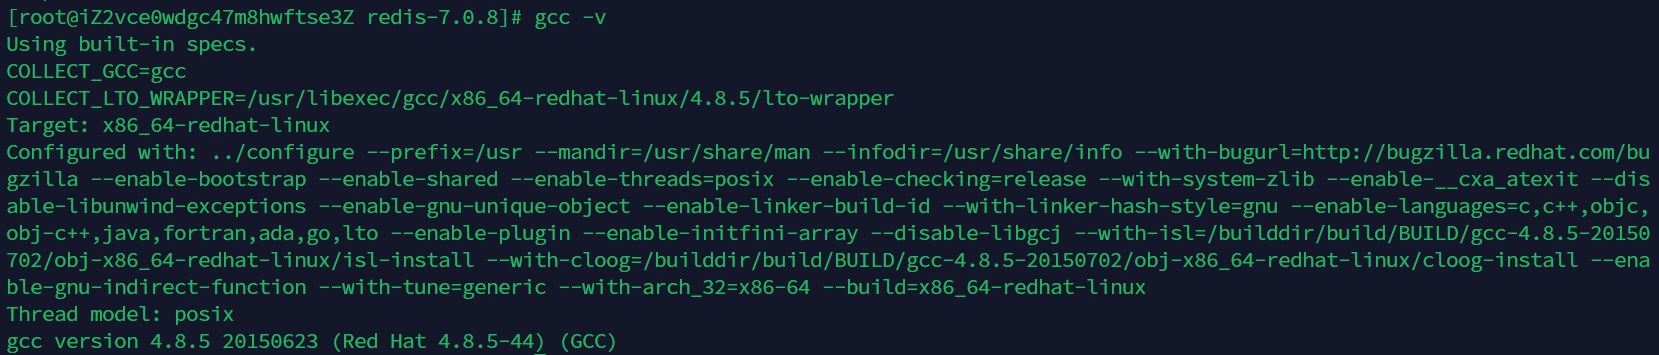
等待其安装完成,输入`gcc -v`查看当前gcc的版本:
5. 在redis目录下使用`make && make install`命令进行编译安装。
6. Redis默认安装到了**/usr/local/bin**目录下

7. 将解压后文件夹中配置文件拷贝过来,以后就用这个配置文件来启动Redis服务。
<img src="https://cdn.jsdelivr.net/gh/liaojie1314/PicGo@master/images/202302021233631.png" alt="image-20230202123301604" style="zoom:67%;" />
8. redis默认不是后台启动的,修改配置文件
```bash
打开配置文件
vim redis.conf
将 daemonize 后的 no 改为 yes
daemonize yes
保存
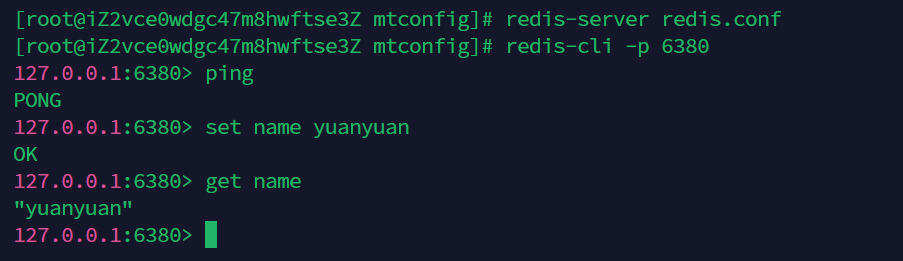
wq!启动连接Redis服务并测试(这里我换了端口,因为6379被docker中的Redis占用了)
1
2
3
4
#启动redis服务
redis-server redis.conf
#连接redis服务
redis-cli -p 6379
使用docker安装Redis
安装docker
以下命令基于CentOS环境
- 下载工具
1
yum install -y yum-utils
- 设置镜像的仓库
1
2
3
yum-config-manager \
--add-repo \
https://mirrors.aliyun.com/docker-ce/linux/centos/docker-ce.repo #配置阿里云的镜像- 更新yum软件包索引
1
yum makecache fast
- 安装docker相关配置
1
yum install docker-ce docker-ce-cli containerd.io
- 启动docker
1
2
3
4
5
systemctl start docker
查看当前版本号,是否启动成功
docker version
设置开机自启动
systemctl enable docker
如果您想仔细学习docker,可以去我下面的文章看一看
- 安装redis
1 | docker run --restart=always --log-opt max-size=100m --log-opt max-file=2 -p 6379:6379 --name myredis -v /home/redis/myredis/myredis.conf:/etc/redis/redis.conf -v /home/redis/myredis/data:/data -d redis redis-server /etc/redis/redis.conf --appendonly yes --requirepass 1111 |
参数详解
- –restart=always 总是开机启动
- –log 日志方面
- -p 6379:6379 将6379端口映射出去
- –name 给这个容器取一个名字
- -v 数据卷挂载
- /home/redis/myredis/myredis.conf:/etc/redis/redis.conf 这里是将 liunx 路径下的myredis.conf 和redis下的redis.conf 挂载在一起
- /home/redis/myredis/data:/data 同上
- -d redis 表示后台启动redis
- redis-server /etc/redis/redis.conf 以配置文件启动redis,加载容器内的conf文件,最终找到的是挂载的目录 /etc/redis/redis.conf 也就是liunx下的/home/redis/myredis/myredis.conf
- –appendonly yes 开启redis 持久化
- –requirepass 1111 设置密码 (如果你是通过docker 容器内部连接的话,就随意,可设可不设。但是如果想向外开放的话,一定要设置)
如果你想要安装指定版本的redis可以去dockerhub查看redis版本,dockerhub中也提供了安装步骤
- 测试redis
1、通过docker ps指令查看启动状态
1 | docker ps -a |grep myredis # 通过docker ps指令查看启动状态,是否成功. |
2、查看容器运行日志
1 | docker logs --since 30m <容器名> |
此处 --since 30m 是查看此容器30分钟之内的日志情况。
3、容器内部连接进行测试
进入容器:
1 | docker exec -it <容器名> /bin/bash |
验证密码:
1 | auth 密码 |
- 配置文件
1 | # bind 192.168.1.100 10.0.0.1 |
可以去redis官网下载
至此Redis的安装已经完成了,接下来就让我们一起学习Redis吧!!!
本博客所有文章除特别声明外,均采用 CC BY-NC-SA 4.0 许可协议。转载请注明来自 元渊`Blog!
相关推荐


评论