
Redis(六)进阶:Redis的配置文件详解
前言
前面的学习我们只是知道了如何使用Redis ,但是我们作为开发人员,我们不仅要知其然,还要知其所以然,所以我们得从根本上理解,我们必须将Redis.conf(windows版叫redis.windows.conf)文件仔细的学习一下,提升自我!放飞自我!
在实际工作中:一些小小的配置,可以让你脱颖而出!
单位:Redis配置对大小写不敏感!

注意这里:任何写法都可,不区分大小写。
units are case insensitive so 1GB 1Gb 1gB are all the same.
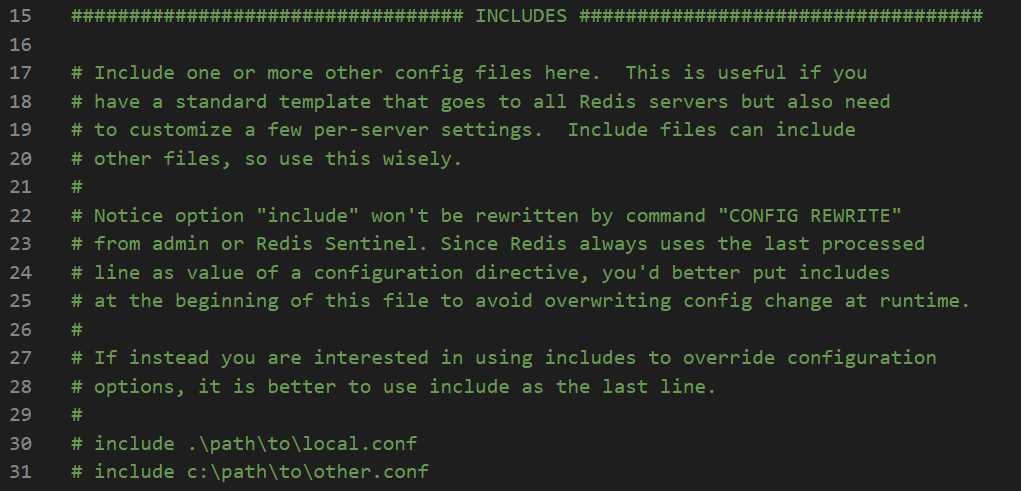
包含:搭建Redis集群时,可以使用includes包含其他配置文件
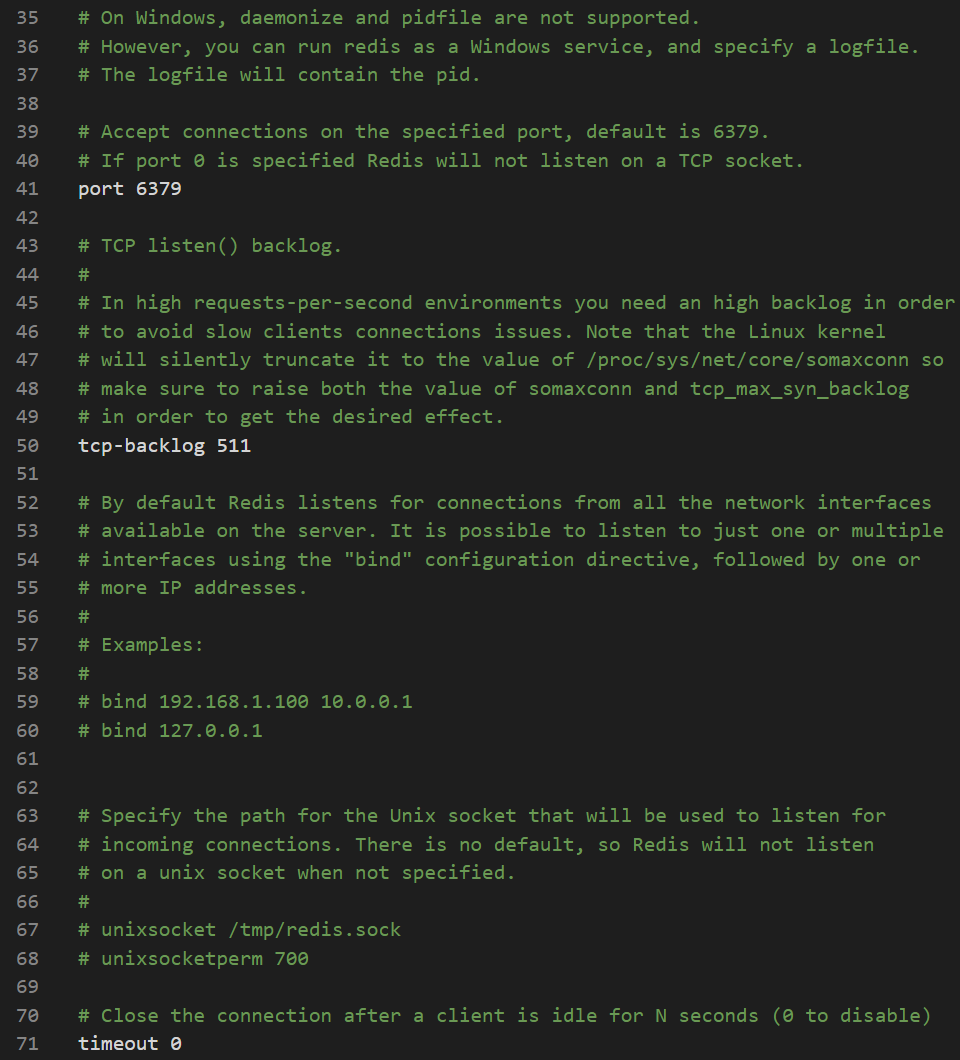
网络:
解释如下所示:
1
2
3
bind 127.0.0.1 # 绑定的ip
protected-mode yes # 保护模式
port 6379 # 端口设置通用GENERAL
1
2
3
4
5
6
7
8
9
10
11
12
13
daemonize yes # 以守护进程的方式运行,默认是 no,我们需要自己开启为yes!
pidfile /var/run/redis_6379.pid # 如果以后台的方式运行,我们就需要指定一个 pid 文件!
# 日志
# Specify the server verbosity level.
# This can be one of:
# debug (a lot of information, useful for development/testing)
# verbose (many rarely useful info, but not a mess like the debug level)
# notice (moderately verbose, what you want in production probably) 生产环境
# warning (only very important / critical messages are logged)
loglevel notice
logfile "" # 日志的文件位置名
databases 16 # 数据库的数量,默认是 16 个数据库
always-show-logo yes # 是否总是显示LOGO快照(RDB):持久化,在规定的时间内,执行了多少次操作则会持久化到文件 .rdb .aof文件
Redis是内存数据库,如果没有持久化,那么数据断电即失!1
2
3
4
5
6
7# 如果900s内,如果至少有一个1 key进行了修改,我们及进行持久化操作
save 900 1
# 如果300s内,如果至少10 key进行了修改,我们及进行持久化操作
save 300 10
# 如果60s内,如果至少10000 key进行了修改,我们及进行持久化操作
save 60 10000
# 我们之后学习持久化,会自己定义这个测试!SECURITY 安全
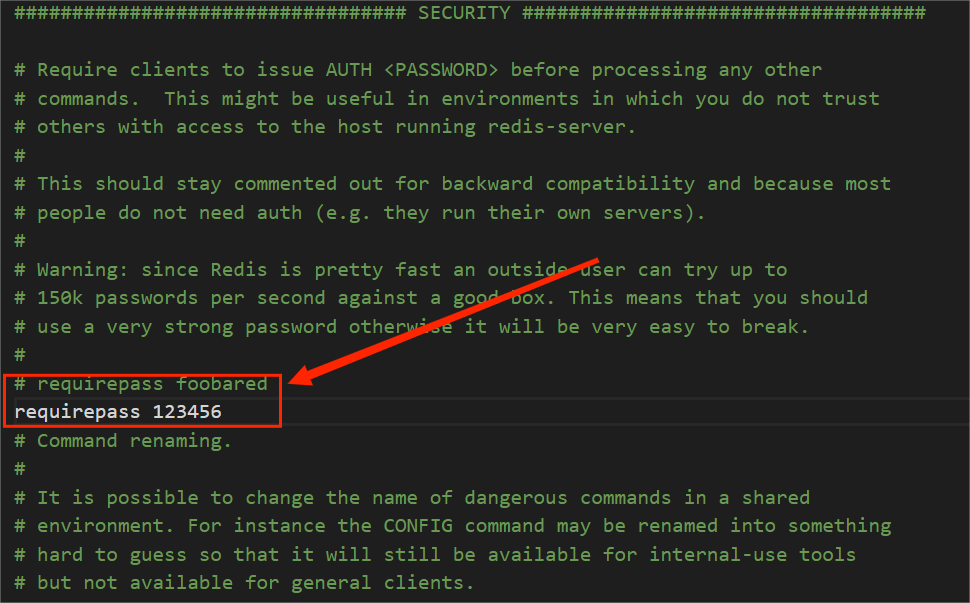
可以在这里设置Redis的密码,默认是没有密码的。
①通过命令设置1
2
3
4
5
6
7
8
9
10
11
12
13
14
15
16
17
18
19
20127.0.0.1:6379> ping
PONG
127.0.0.1:6379> config get requirepass #获取Redis的密码
1) "requirepass"
2) ""
127.0.0.1:6379> config set requirepass "123456" #设置Redis的密码为123456
OK
# Ctrl+C 退出当前连接
[root@dyjcomputer bin]# redis-cli -p 6379 #重新连接
127.0.0.1:6379> ping #测试ping,失败,所有的命令都显示无权限
(error) NOAUTH Authentication required.
127.0.0.1:6379> set k1 v1 #失败,所有的命令都显示无权限
(error) NOAUTH Authentication required.
127.0.0.1:6379> auth 123456 #auth + 密码 登陆上去
OK
127.0.0.1:6379> ping #正常
PONG
127.0.0.1:6379> config get requirepass #获取密码,正常
1) "requirepass"
2) "123456"②通过修改配置文件设置,找到图示位置,添加密码
重启Redis测试
1
2
3
4
5
6127.0.0.1:6379> ping
(error) NOAUTH Authentication required.
127.0.0.1:6379> auth 123456
OK
127.0.0.1:6379> ping
PONG限制CLIENTS
1
2
3
4
5
6
7
8
9maxclients 10000 #设置能连接上redis的最大客户端的数量
maxmemory <bytes> #redis 配置最大的内存容量
maxmemory-policy noeviction #内存到达上限之后的处理策略
1、volatile-lru:只对设置了过期时间的key进行LRU(默认值)
2、allkeys-lru : 删除lru算法的key
3、volatile-random:随机删除即将过期key
4、allkeys-random:随机删除
5、volatile-ttl : 删除即将过期的
6、noeviction : 永不过期,返回错误APPEND ONLY 模式 aof配置(持久化保存)
1
2
3
4
5
appendonly no #默认是不开启aof模式的,默认是使用rdb方式持久化的,在大部分所有的情况下,rdb完全够用!
appendfilename "appendonly.aof" #持久化的文件的名字
# appendfsync always # 每次修改都会 sync。消耗性能
appendfsync everysec # 每秒执行一次 sync,可能会丢失这1s的数据!
# appendfsync no #不执行 sync,这个时候操作系统自己同步数据,速度最快!

本博客所有文章除特别声明外,均采用 CC BY-NC-SA 4.0 许可协议。转载请注明来自 元渊`Blog!
相关推荐


评论